GIMP-2.10 画面のエクスポート
ここでは、GIMP-2.10の画像の作成から画像のエクスポートまでの工程を説明します。
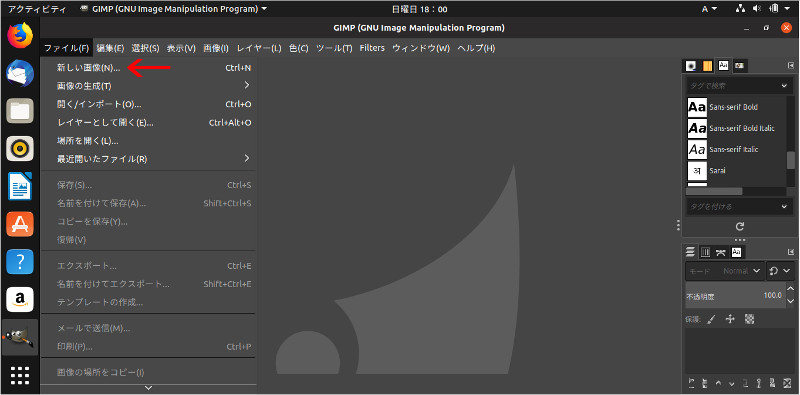
まず、最初に上部タスクバーの「ファイル」をクリック>「新しい画像」をクリックします。
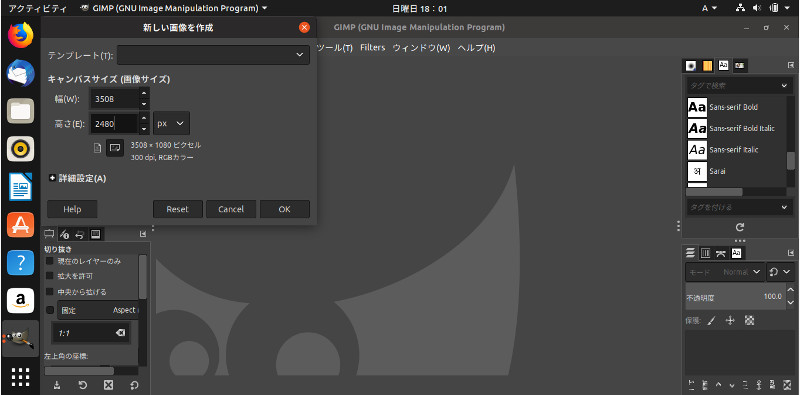
横向きA4サイズの場合は、「幅(W)=3508」・「高さ(E)=2480」にします。
予めインターネットからダウンロードしておいた画像をインポートするため、
「ファイル」をクリック>「開く/インポート」をクリックします。

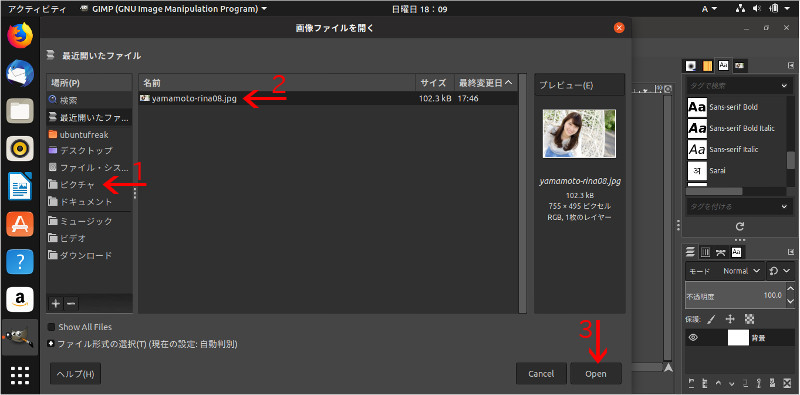
「画像ファイルを開く」画面が表示されたら、
1・画像の保存されているフォルダをクリック(ここでは、「ピクチャ」)
2・インポートしたい画像をクリック
3・右下の「Open」をクリックします。
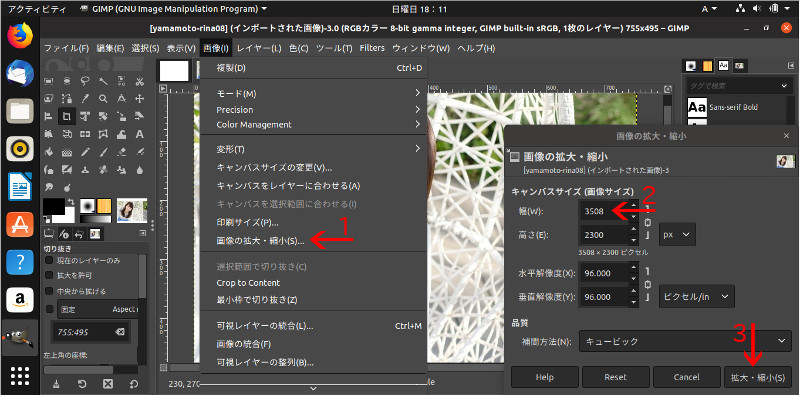
画像がインポートされたら、その画像を拡大します。
1・上部タスクバーの「画像」をクリック>「画像の拡大・縮小」をクリック
2・「画像の拡大・縮小」の管理画面の「幅(W)=3508」にして、
(「高さ(E)」の数字の部分をクリック>自動比率となります。)
3・右下の「拡大・縮小」をクリックします。
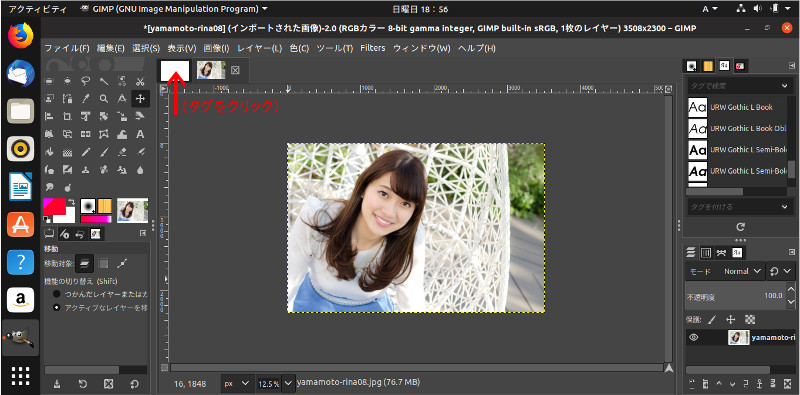
上部タスクバーの「編集」をクリック>「コピー」をクリックします。

上部タグをクリックして、「幅=3508・高さ=2480」の画像に切り替えます。
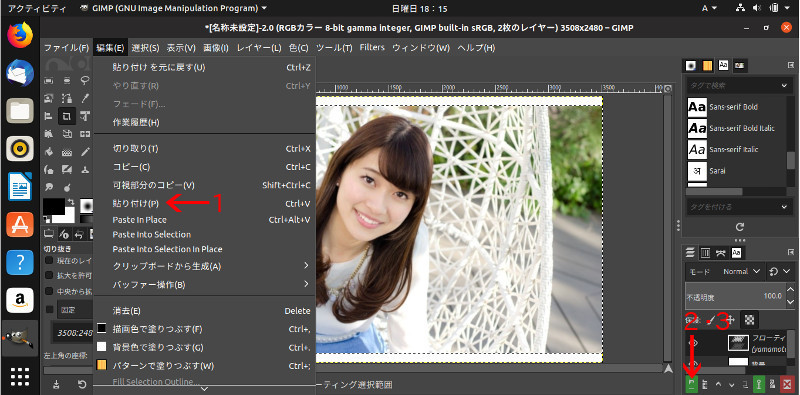
「幅=3508・高さ=2480」の画像に先にコピーした画像を「貼り付け」ます。
1・上部タスクバーの「編集」をクリック>「貼り付け」をクリック
2・右下の方の「レイヤーの追加」ボタンをクリックして「貼り付け」終了
3・次の作業のために、もう1回同じ「レイヤーの追加」ボタンをクリックします。
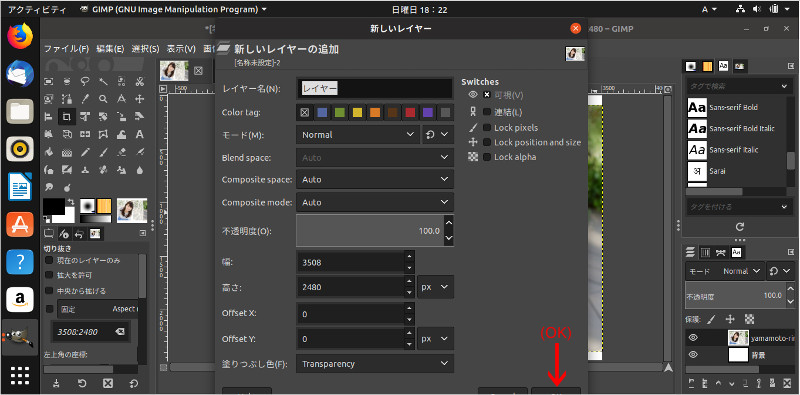
「新しいレイヤー」を追加して、画像の枠を作成してみます。
「新しいレイヤーの追加」画面が表示されたら、右下の「OK」をクリックします。
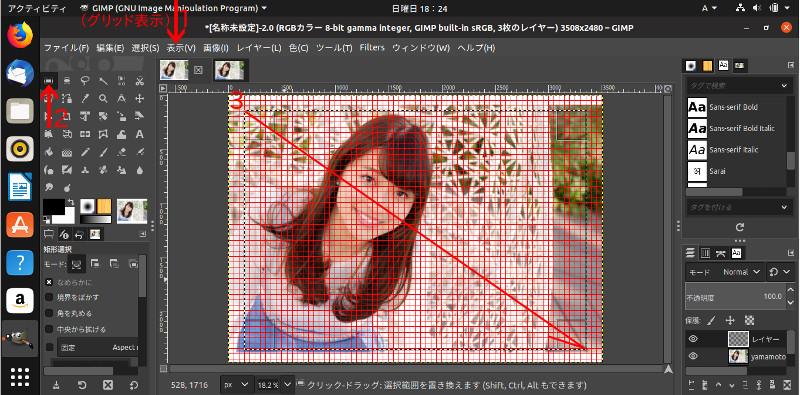
作業の快適化のために、「グリッド」を表示します。
1・上部タスクバーの「表示」をクリック>「グリッド表示」をクリック
2・左側の「□選択」アイコンをクリック
3・マウスをクリックしたまま斜めに「□選択」します。
*ラインにマウスを当てると縦・横自由に□の大きさを変更できます。
「□選択」外を1回クリックすると「□選択」が解除されます。
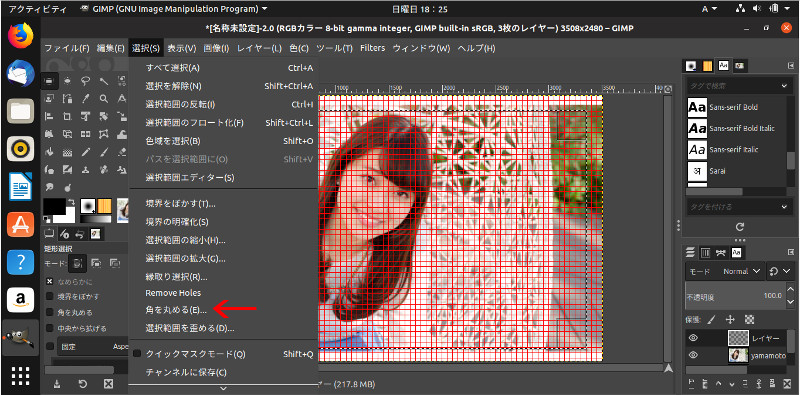
「□選択」の角を丸めます。
上部タスクバーの「選択」をクリック>「角を丸める」をクリックします。
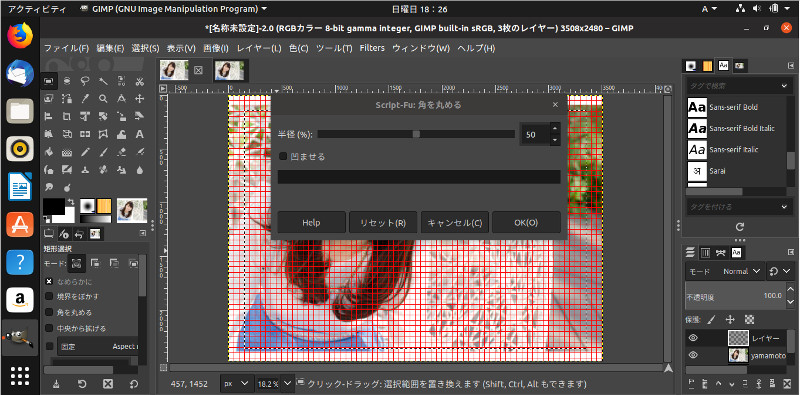
「角を丸める」の半径の値(50)を決めて「OK」をクリックします。
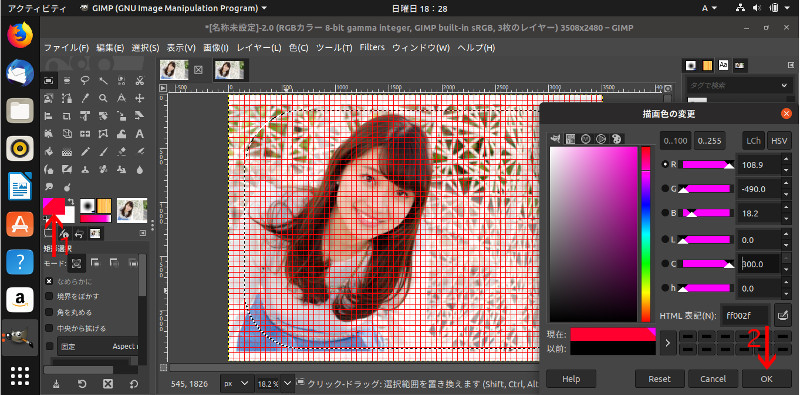
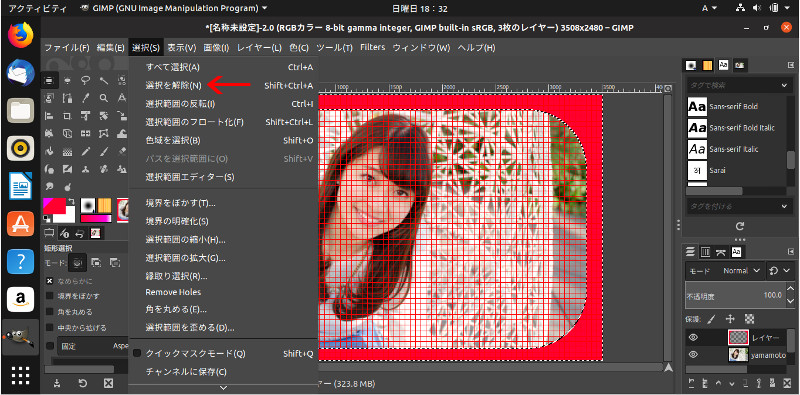
上部タスクバーの「選択」をクリック>「選択範囲を反転」をクリックします。

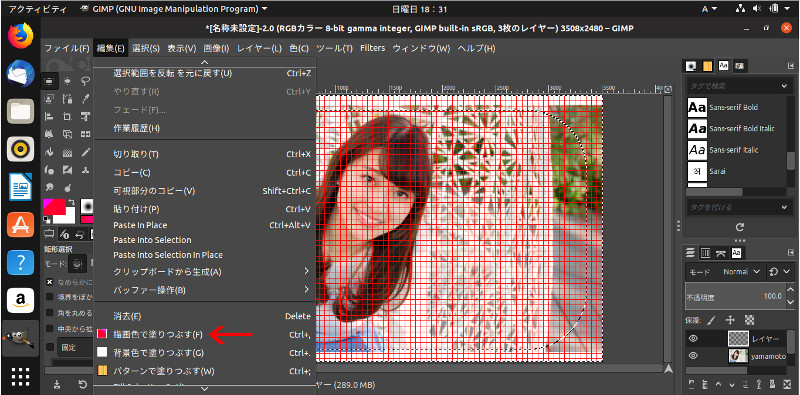
左側の「絵画色」をクリック>「現在の色」を選択>右下の「OK」をクリックします。
上部タスクバーの「編集」をクリック>「絵画色を塗りつぶす」をクリックします。
上部タスクバーの「選択」をクリック>「選択解除」をクリックします。
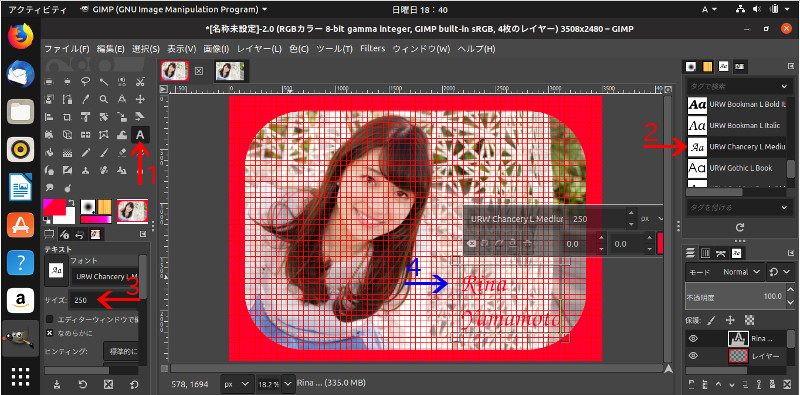
次に、サインを記載してみましょう。
1・左側の「A」アイコンをクリック
2・右側のタグから好みの「フォント」をクリックして選択
3・左下の「サイズ」でフォントの大きさを調整
4・目的の位置にクリック>サインを入力
*大文字にしたい場合は、「SHIFT」キーを押しながら入力します。改行は、「Enter」キーを押します。
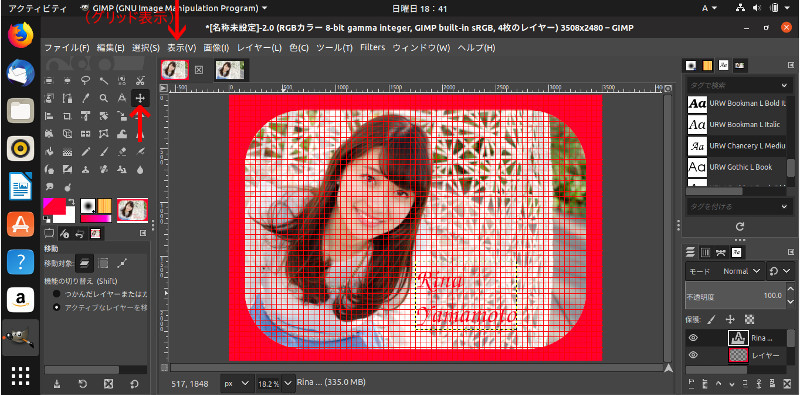
左側の「移動」アイコンをクリック>「サイン」の位置を決定します。
次に、「グリッド」を解除するために上部タスクバーの「表示」をクリック>「グリッド表示」をクリックします。
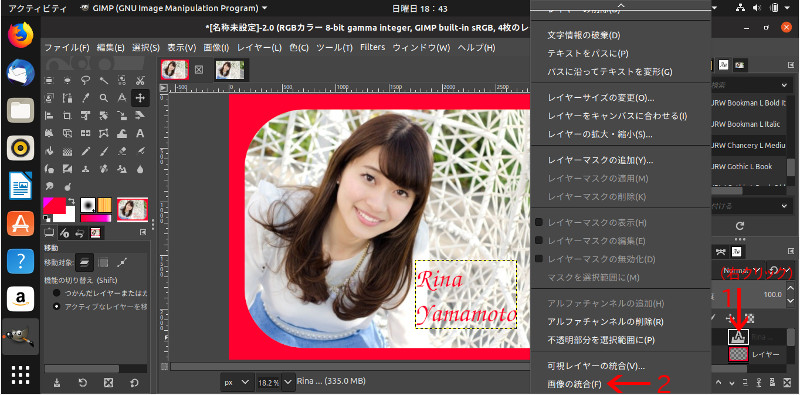
右下の「レイヤー」を右クリックして、「画像の統合」をクリックします。
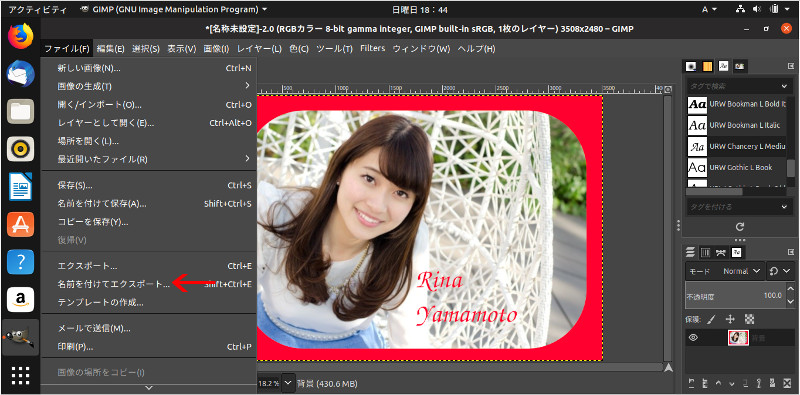
上部タスクバーの「ファイル」をクリック>「名前を付けてエクスポート」をクリックします。
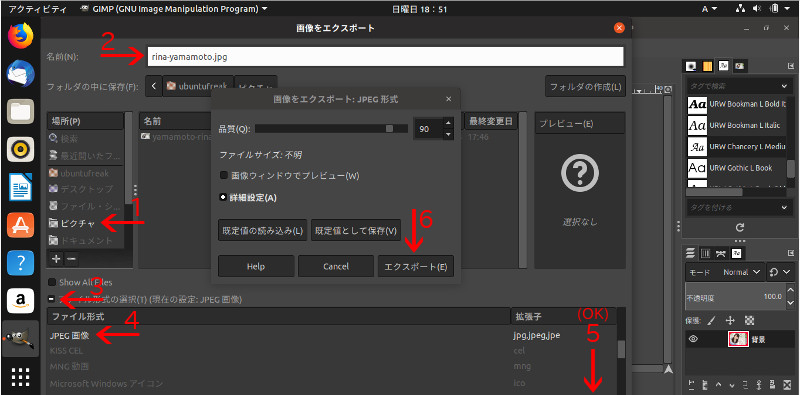
「画像をエクスポート」の管理画面が表示されたら、
1・場所>「ピクチャ」をクリック
2・画像の名前を入力
3・左下の「ファイル形式の選択」の左側の「+」をクリック(「‐」に変更)
4・「ファイル形式の選択」(LPEG画像「-.jpg」)
5・右下「OK」(エクスポート)をクリック
6・「画像のエクスポート」の管理画面が表示されたら、「エクスポート」をクリック
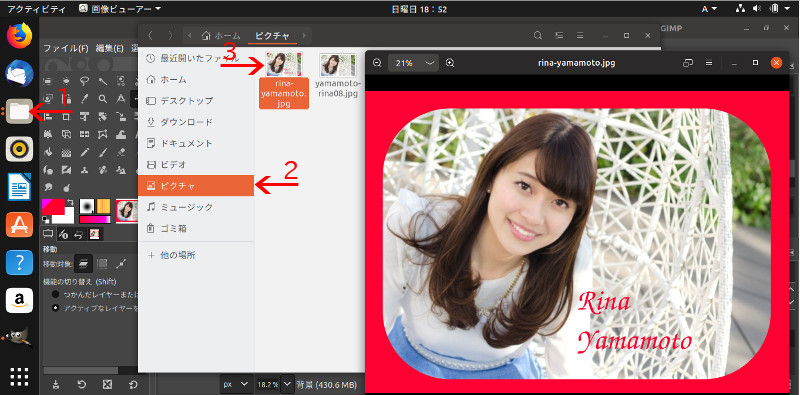
出来た画像を確認します。
1・左側の「ランチャー」の「ファイルマネージャー」をクリック
2・フォルダの選択(ピクチャ)
3・出来た画像をクリック(確認)
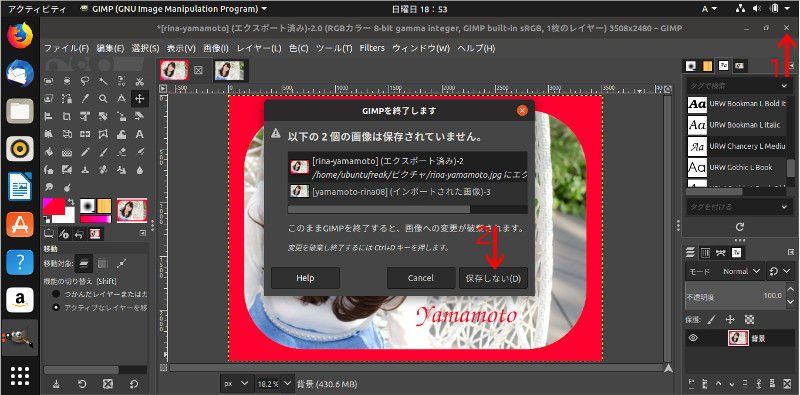
最後に、右上の「×」をクリック>「保存しない」をクリックして完了です。